Bespoke Guitar Part Three

Now that we’ve got the body done, it’s on to the neck.

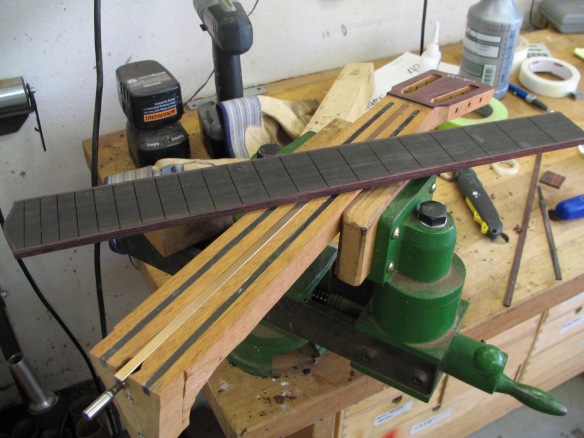
I start with pattern grade quarter sawn genuine mahogany.  This is a very stable and relatively lightweight wood that has been used successfully in both instruments and furniture. The first thing I do is to square it off with a plane, then cut the truss rod channel and the two channels for the graphite reinforcement.  Once this is done I cut the profile for the neck and glue on the peghead overlay, in this case, book matched camatillo.  My client wanted a slotted peghead so I used a jig I made to cut the appropriate slots.  After the truss rod and the graphite bars are installed the head stock is inlayed with my logo and the fingerboard prepped. In this case the fretboard is bound in rosewood to match the binding on the body.

Now I glue the fingerboard on, being careful to keep it aligned with the neck.  After it’s dry I start to profile the neck.  As I have mentioned before, I find this easier to do by hand as I can finish the job in about the same time it would take me to set up a CNC.

The final post will be finishing and putting the whole thing together.

Building a Bespoke Guitar Part Two

Now the side braces are fitted and installed.  This makes for a much stronger side brace than the traditional tape Martin uses today.

I then mark and cut out for the braces on the back to be inlet into the sides.  This makes for a rigid structure that locks the back to the sides.  I put the back into the vacuum so that when it’s glued to the sides it matches the 15 foot radius I was so careful to create.

I repeat the same thing with the top, making sure everything is aligned.

I then trim the top and back in preparation for the binding channels to be cut.  Before I do that I mix a little water with yellow glue and coat the areas of the top.  When this is dry, it acts as a sizing hardening the soft wood in the summer grain so it has less chance of tearing out

Unless a customer requests it (not happened yet) I do all my purflings and bindings in wood.

Now we have a completed body. 

Next time… the neck.

Building a Bespoke Guitar

This will be the first in a four part series on what goes into a custom made instrument.  In this case, it’s one of my Fingerstyle models with a slot head and cutaway.

Most of my clients have had (and do have) several other high end guitars, usually by boutique builders such as Santa Cruz, Goodall, etc.  They have usually played several of my instruments and have a good idea of what they want.  Even though this is the case, I still ask a lot of questions and make sure I have an understanding of what it is they hope to achieve with a bespoke instrument that they can’t get with what they have now.  Sometimes it’s that they like the sound of my guitars and have specific ideas about neck width, wood choice etc, and sometimes it’s about the aesthetics.  Another consideration in what they’re playing now is what woods they have.  If every guitar is rosewood I will try to steer them in that direction.  That doesn’t mean they are limited in choices as there are many rosewoods to pick from and most share similar sonic properties.  A few of them include:  Camatillo, cocobolo, African blackwood, Madagascar rosewood, Brazilian rosewood, Indian rosewood, Amazon rosewood… and the list goes on.

After the woods are selected, I fill out a form that puts everything in writing and let them know what I think the lead time is as well as the nuts and bolts of the nasty issue of money.  I ask for a nonrefundable deposit of 25% of the cost.  This allows me to cover the cost of materials and guarantees their place in the queue.  I also tell them about the return policy should it be needed (haven’t had that problem yet).  I give them 72 hours to return the guitar.  It must be in perfect cosmetic condition and I will give them a full refund when I sell the instrument.  This is a very important point.  This is not something that can simply be put back into stock as I am not a big box store and cannot absorb those kinds of costs.  I think it’s important to make sure they know exactly what to expect, as this, to some extent, is a big leap of faith on their part.  They are entrusting me to make their dream guitar, and I feel it’s an obligation for me to not let them down.  Finally, I have them sign a contract and away we go.

Enough hot air, on to the build.

I’ll be documenting a custom guitar for Tim Pacheco, a professional musician from the central coast of California. He chose camatillo (dalbergia congestiflora) for the back and sides and bear claw Sitka (Picea sitchensis) for the top with a matching rosette and slotted peghead overlay and a cutaway.  All of my guitars have wood binding and purflings, in this case, rosewood binding with a black/white/black/white purfling for the top and white/black for the back.

After they’re jointed, they’re both cut out and thicknessed, and the rosette cut into the top.

Now the top and back are braced.

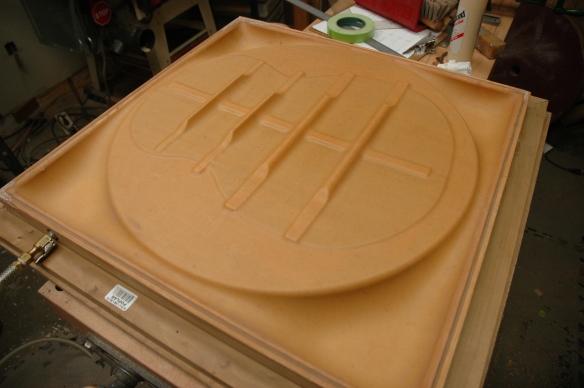
I use a vacuum pump and rubber bladder to glue the braces.

The vacuum is an excellent clamping system, in my opinion, much better than clamps or a go bar deck.  It puts an even pressure of 21 hg (inches of mercury) or about 10 1/3 pounds per square inch on the surface.

The sides are bent next, using a silicone heating blanket and a form.  I still bend the cutaway by hand with a hot pipe and set it in the form.

Next week the body takes shape.

Re-fretting a Bozo

While I’ve done a post on re-fretting a guitar I thought it would be interesting to see some of the tools I use.  A small three corner file to bevel the edge of the fret slot so that the frets go in easier and when they have to be pulled less chipping.This is the tool I made for putting the 30 degree bevel on the fret edges.  It uses a mill smooth file with a high density, low friction plastic base.Flush ground end nippers for cutting frets close to the board.This tool cuts the tang off the fret ends to go over the binding.This is a small needle file with the edges ground and polished so I can remove the sharp edges from the fret end.This contraption I call Frankenfretter.  It’s a sliding base I bolt to the drill press to support the guitar while I compression fret it.  Notice the Taylor fret buck, a massive support for the guitar body while I fret.And finally, the finished job.

Color Match Finish Coats

Now that we’ve got the color match we can complete the finish.

I then spray the top coats.  I start by lightly spraying in alternate patterns.  Horizontal then vertical, and then switching to diagonals to get the most even coverage.  I shoot 2 to 3 coats a day then sand with 320 grit wet or dry, being careful not to sand through the color coat.

Lacquer and other top coats follow, they don’t fill.  That means that the lacquer will flow into the depression not fill it up.  By sanding in between coats you are taking off lacquer on the surface while not touching the depression.  The next time you spray, the depression will be that much smaller.

I usually spray between 6 and 9 coats to get the desired result.  Prep work is critical because the less depressions and holes you have the less you have to finish.

When I’m satisfied with the raw finish I let it dry for a minimum of 2 weeks to allow the finish to cure and shrink.

When the finish is dry, it’s not a simple mater of putting the guitar together. The finish has to be compounded to smooth out the ripples.  Compounding is going through a series of abrasives until the surface is smooth and mirror like.

I start with no lower grit than 600 wet or dry and usually 800 grit.  I use the best quality paper. 3M Imperial wet or dry seems to work well.  The cheaper papers have larger stray grit in them and can cause scratches that are almost impossible to remove.  This is also the case if you start with anything coarser than 600 grit.

The first sanding is the most important. I lubricate with water to float the particles off and for less loading of the paper. It’s very important that you use a hard rubber, cork or felt pad to be sure of a flat surface.  Never sand with you fingers.   I make sure all the gloss is taken off so that the surface is dull but smooth and uniform.  Now I switch to Micro Mesh.  This is an abrasive in cushioned latex that doesn’t build up as easily and is very high quality.  The 1500 grit is equal to 600 grit sandpaper so I start with the next one up, 1800.  I continue with this to 4000 grit also using water as a lubricant.  Then I switch to another abrasive, Abralon.  This is a 6″ pad I use with a 5″ random orbital sander.  Using 2000 and proceeding to 4000, I use these pads dry.  I leave the 6″ pad full size to protect the guitar from the rubber pad on the sander.  In tight corners, I use the pad by hand. One thing to remember is to clean off all the previous slush so that the next grit starts fresh.

Now the fun part, using a buffer to bring the gloss up!  In reality all you are doing in each step is to make the scratches finer and finer until they appear to go away.  I use a Shop Fox buffer and 12″ domet wheels.  I make sure not to contaminate the compounds with the wrong wheel.  While they make several grades, I stick with the fine and extra fine.

Buffing wheels can be very dangerous if you’re not careful with the way they are used.  Remember when you’re buffing to only buff the bottom half of your piece.  Right

Wrong.

If you use the buffer like this you will run the risk of catching the upper surface and having your piece thrown to the ground.  I believe you will not like the result much so be aware of your orientation.

I do the same thing with buffing that I do with sanding, changing direction of the piece’s orientation with the wheel: horizontally, vertically, and diagonally. When finished with the fine wheel, clean the surface of the piece to clean the previous compound then proceed to the extra fine.  Wax is not recommended and will in fact make the piece duller.

When you’re done you should have a mirror finish to be proud of.

Resetting a Neck on a Bozo Podnuavac Part 2

Now that we have the neck off, and I’ve let it dry for at least a week, we can proceed to the reset.

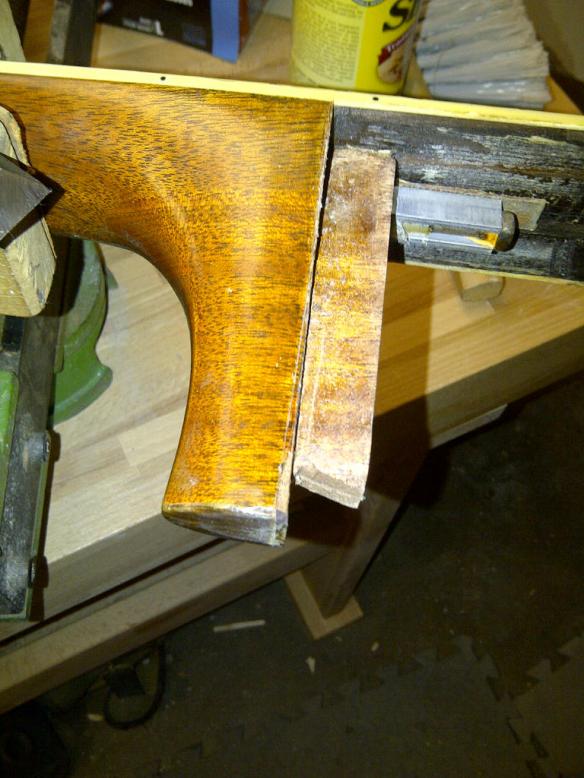
This guitar will have a fret job as well so all the frets were pulled.The first step in the reset is to determine how much of the heel needs to be removed.  As I stated in the previous post the current neck angle left the straight edge about 1/8″ above the top or about 1/4″ too shallow.   Since the heel is about 4″ and the distance from the nut to the saddle is about 25 1/2″ it takes a fraction of amount taken off at the heel to make the 1/4″ needed to correct the angle.  My usual formula (not scientific by any standard) is to take about an 1/8th of the amount off the heel.  So in this case, I would take off a 1/32″ from the heel or an 1/8th of the 1/4″.  Some people use a file to do this but I prefer a very sharp chisel.  I cut to the line on a bevel, then back cut on a slight angle so that shoulders of the neck “bite” into the body. I may repeat this several times, until I get the angle right.  Make sure you take the same amount of material off both sides of the heel to maintain the correct trajectory to the bridge.

This gets me into the ball park, but I use another method to get the final fit.  For this step I use 100 or 120 grit self adhesive sandpaper with the backing left on.  I put the neck on the body and put the sandpaper between them, slick side toward body.This does the final fitting.  I’ve run across several bodies that are not completely flat, so this works very well for this.  Make sure when you are doing this, you do not pull the sandpaper up because you will take too much off the heel.  Again, care should be taken to ensure both sides are even.  When you are satisfied with the fit you must now adjust the dovetail geometry.

I you have taken more than an 1/8″ off the heel you will first need to take off material off the back of the dovetail to clear the back of the head block.  Once this is done you can now make the shim for the re-fit.In taking wood from the bottom of the heel you will have a lose fit because the dovetail is now smaller at the bottom.  The top should be relatively tight because no material should have been removed (in fact, if wood is taken away form the top of the dovetail, it will effect the intonation because the neck will be closer to the bridge).  I make two wedges, one for each side of the dovetail.  Using .032″ thick veneer 5/8″ wide and almost the length of the dovetail I taper the thickness from the full .032″ to nothing.  A trick for getting this done is to use a piece of double stick tape on one side of the shim so that I can secure it to my fingers while sanding. Carbon paper or lamp black used in between the neck and head block is a good way to test the fit.   I do this until I”m satisfied with the joint.  I have to say that the original dovetail was a very fine fit, a testament to Mr. Podnuavac’s work.

I then glue the neck back on using the same type of glue as the original.  In this case hide glue was used.  NEVER use epoxy, polyurathane or any other glue that can’t be reversed!!!   I touch up any finish issues, such as chipped lacquer around the body or neck.

The 15th fret will have to be replaced, making sure it is in line with the others and doesn’t cause any buzzing (in this case a re-fret was needed).  Finally a new saddle will have to be constructed.

Even if you never do this on your own guitar it will give you some understanding of why this kind of repair costs so much money.

Resetting a Neck on a Bozo Podnuavac Part 1

This is a pretty common but more advanced repair.  Steel string “flat top” guitars have over two hundred lbs. of force from the strings trying to collapse the neck into the body.  Unlike classical guitars where the neck is part of the head block (they have much lower tension), steel strings were made with a neck separate from the body so that they can be disassembled.  Most of the older instruments use a dovetail, either tapered or straight, to attach the neck to the body.  A lot of modern luthiers use bolts to anchor the neck.  There has been a lot debate about what’s better, but as someone who has built over 50 instruments, half bolt, half dovetail, I can’t tell the difference in tone.

If you lay a straight edge along the fret board on a guitar with a proper neck set, the straight edge will just come to the top of the bridge.  A saddle that is too short or too tall will affect the tone and playability.  A general rule is about 3/8″ above the top at the bridge position.

A common method in the past was to shave the bridge (not a good idea) or to “slip the block.”  This is when the back was heated and pressure put on the neck to “slip” the head block, moving the neck angle. When the back cooled the glue would harden.  The problem is that the back was exposed and needed to be trimmed and rebound.

In this example, I’ll be resetting a neck on a guitar by Bozo Podnuavac (pronounced Bo-zho).  He gained fame in the 70’s for his flamboyant 6 and 12 string guitars played by people like Leo Kottke. 

This guitar had been pretty mistreated.  The head stock was broken and poorly repaired.  Numerous cracks have been haphazardly repaired and pressure from the neck had cracked the top on both sides of the fret board and moved the head block toward the body.

A straight edge determined that the neck angle left the height at the bridge about 1/4″ below what it should have been.

The first thing I need to do is separate the fret board from the body. This is done by heating the fret board and carefully working a thinned putty knife under the board.  I’m very careful about this and don’t force the knife.  When the glue is soft it will slide under the board fairly easily.  LMI and a few other companies make a silicone heating blanket just for this purpose.  Stew-Mac also makes a massive iron with space milled for the frets just for this purpose.  In this case I’ll be using the blanket

If the neck joins the body at the 14th fret I pull the 15th fret to make way for two holes I drill into the slot.  In a typical dovetail the male portion of the neck is about 5/8″ long and the corresponding female joint in the body is 3/4″ deep.  This leaves a gap in the head block and the 15th fret is about 5/8″.

Two tools that I think are essential are from Stew-Mac.  One is the guitar neck removal jig and the other is the neck steamer needle and hose.

The other necessity is a cheap coffee maker capable of making steam.  I set up the removal jig as in the picture and turn the cappuccino on steam and wait for the unit to heat the water.  As an aside always use distilled water or you will have a great deal of mineral buildup.  I put a slight amount of pressure on the bottom screw of the jig, just enough to ensure the jig is not moving.  The steam works very rapidly to soften both hide and yellow glues.  I usually only have to wait 5 or 6 minutes for the joint to loosen.  I keep putting slightly more pressure on the bottom screw until the joint separates.   I also elevate the bottom of the guitar so that all the water from the cooled steam stays relatively contained.  Tapered dovetails remove the easiest but in some instruments the dovetail is straight and they require constant pressure because of the friction.

Sometimes, however the mojo doesn’t work, and this was such a case.  After waiting over 10 min. the joint had not budged!  I was afraid that the joint may be epoxy.  Mr. Podnuavac is still building guitars at 82 so I called him in his current shop in Florida and he did indeed confirm that the joint was a dovetail and should come off.

Take two:  This time I put a little more pressure on the screw and after 10 more minutes it did break loose.  If you look at the truss rod you can see a grey bar on either side of the truss rod housing.  This appears to be epoxy that goes through the head block and under the top. This is what I think was causing the hangup.

Next week.  Refitting and re-gluing the neck.

Gibson Style O Artist part 4: Finish, Setup and Trouble Shooting

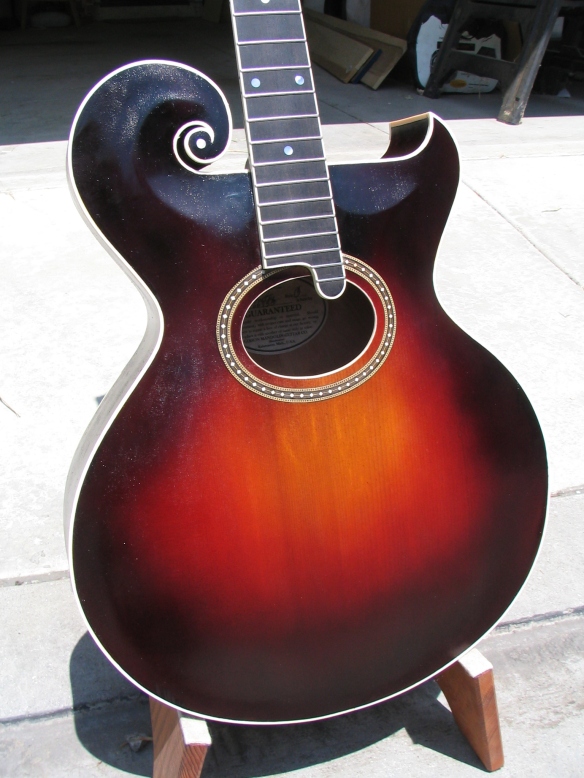
It finally looked like a guitar again.  I sealed the body with Tap marine epoxy.  I did this because the body was pretty dried out and I thought the epoxy would better integrate the surface.  It’s also what I do on my own instruments. 

After it dried a toner coat of  finish using yellow metal acid dye was applied over the entire instrument.  We had agreed to go with amber to dark cherry for the sunburst and dark cherry for the rest of the instrument.  I wanted to go quite dark on the edges and sides to try and hide some of the severe damage to those areas.  One note, I had put in the pearl dot at the center of the scroll, as per all the pictures I had seen, and when I sent the pictures of this guitar for approval on the finish color, I had forgotten about the conversation we had about omitting the dot. It was a quick fix, but also a reminder to write everything down.

After scraping the bindings I sprayed 6 coats of KTM-9 (before anyone howls, I’m severely allergic to lacquer and don’t have that much experience with varnish) sanding every two coats.  I tinted the finish with a slight amber color to tone down the new ivoroid, and to blend it in with the existing pieces. Although I’m not sure that was necessary because only the heel cap, soundhole surround and the tip of the Florentine cutaway survived.  I also saved small jars of the colors so if I went through the burst I would have a match to the previous colors.  It probably would have been smart to document the ratios, but if I were smart I wouldn’t be building guitars for a living.

On the Gibson HG I repaired I didn’t finish sand the final coat of finish, just buffed it out to a gloss leaving all the imperfections.  It is an 85 year old guitar and it was decided that it should look a little lived in.

The tailpiece had been broken and Jim had that fixed but the plating had been compromised, so he found a place to get it re-plated.  The holes for the bridge pins were way oversized by wear, so I used some celluloid pickguard material to line the holes of the celluloid tailpiece, and cement them with acetone. The hardware was installed next, followed by a level crown and polish of the frets and cutting the nut slots. It was interesting to me to see that in most of the pictures of Artist O’s the three in line machines were installed upside down, the knobs being below the posts.  Since the back of the peghead was now free of any holes I thought it best to put the Waverly’s with the name up as on a modern guitar.  I was concerned that they might not hold up as well upside down since they weren’t designed to be used that way.

I only had light gauge strings on hand and even though I thought they’d be a little weak in tone, I was anxious to hear how the guitar sounded.   After bringing the guitar to pitch I was thrilled with the sound.  It was much more alive than I had thought it might be, very rich, even with light gauge strings.  Unfortunately, it became obvious I was not finished with the job. After only five minutes the top on the treble side had started to cave in.  A depression was forming around the foot of the bridge and I immediately detuned the guitar before I had a catastrophic failure.  Apparently, my predecessor had been a little too overzealous in his working of the top and it was way too thin.   I didn’t think to check the top’s thickness before I installed it on the body.  This is another mistake I will not make again.  I thought the best way to handle this was to make a “bridge plate” much like a flat top.  I used a piece of cross grain Indian rosewood at .09” and formed an arch approximating the arch on the Gibson with a heating iron.  Then I used the topography created by the new braces to give me an approximate bridge plate size and cut and fit the rosewood so that I had a friction fit between the braces.  I figured that with a tight fit to the braces that the top under the bridge wouldn’t deform as much if it had support.  Once that was done it was a simple matter to make cauls and glue the plate in.  I was lucky that the Artist O has an oval sound hole that I could fit my hand in.  If this had been an L-4 the “f” holes would have been a much harder job. 

After letting the glue overnight it was time to string it up again and hope for the best.  The good news was that after a couple of hours there was no more deformation and even better news was that the bridge plate didn’t affect the tone at all.  It held tune and was actually louder than it had been without the plate.  Only time will tell if it was a complete success. 

Would I do it again?  Probably not at this price.  Was I sorry I took the job on?  Absolutely  not.  It was a challenge, but I feel that I got quite a bit out of it, and transformed a bag of kindling into a guitar again, a guitar that would be played and not just hung on a wall.  Jim Richardson may not look like Big Bill Broonzy, but he might someday be the coolest guy in the nursing home. 

Gibson Style O part 2

Here are pictures of the reproduction label I made and the label inside the top

The next job was to repair the missing piece on the back.  I found a suitable piece of birch and after gluing it to the back reshaped and blended in with round bottom plane.  Then it was time to clean the back up around where the kerfing had been.  The inside of the back had quite a few plane marks which I assume were original so I left them alone.

I then made a caul of particle board and used my go-bar deck to glue the back to the sides.  I kept the sides in the mold to prevent distortion of the shape.  After the glue had dried I used spool clamps to glue the top on.  After being off the body for so long it had deformed a considerable amount.  And I was afraid to use the go bar deck for fear of cracking the top again.  I started at the head block and using a palette knife I worked my way around the top with glue and clamps until I was satisfied with the alignment   The top had divots in line with the braces also, I believe, due to the top being off the body for so long and from the previous luthier sanding and thinning the top before it was put together. 

An interesting fact is that the neck was put on the body before the top was installed.  The top had never been cut for the dovetail.  It seems that the designers at Gibson weren’t yet thinking of some guy 85 years in the future still wanting to play the guitar. Since I was trying to make it a player, I cut the dovetail through, so that the neck could be reset in the future. 

I modified my binding cutter jig to accept the arch (I normally do flat tops) and cut the channels.  Luckily the scroll channels were intact and I didn’t have the misery of cutting those.  I used the same pieces of particle board that I cut for the cauls for the back to keep the body stable while I routed the channels  Before I cut them I sized the wood around the channels with watered down white glue to help keep the brittle wood from tearing out.  A series of wedges served as clamps for the scroll and tape for the rest of gluing in the binding.  After scraping the bindings I filled as many gaps as I could using sawdust, glue and a latex filler. I leveled everything off and sanded the body through 320 grit to prepare it for sealer.

Next week… The neck.

1921 Gibson Style O Artist Ressurection

I don’t normally do guitar repairs, preferring to build my own instruments. This is not a statement that I think building is more difficult or challenging, quite the contrary.  I merely feel it fits my temperament better.  However when The Fret House in Covina was in between repairmen, I told Tom Seymour, its owner, I would help out until he found someone permanent.  He’s owned the store for over thirty years and still has the same passion for the instrument as he did when he opened the store. Tom is a great guy and his store was the first to carry my guitars.

One of the instruments the previous repairman had left was a Gibson Style O Artist.  It was literally a basket case and nothing more than pieces.  Half a fretboard, part of the back missing and a top that had been thinned with new braces put in.  I thought wow, that’s interesting, but what a job that’s going to be.
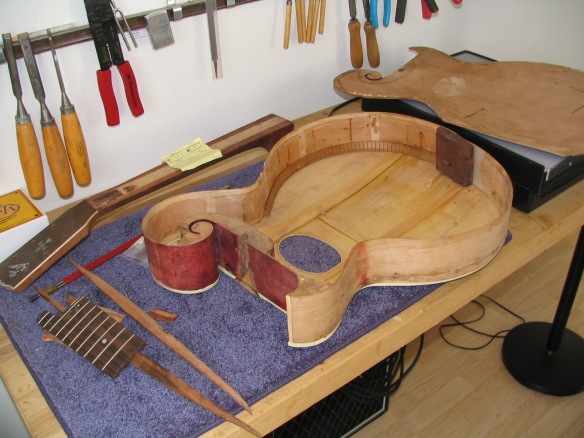
One of the repairs I had done was a Gibson HG, circa mid thirties.  It had a shattered top and numerous other problems.  Its owner, Jim Richardson, also owned the Style O which, as I was to find out, had been there for four and a half years.  When I took on the HG, we kind of used that as a trial run for both of us on the possibility that I would resurrect the Style O.  The HG went well and I found Jim to be reasonable about what could be accomplished and open to my suggestions of what should be done along the way.

Over lunch we talked about his acquisition and I asked him to contribute on how he came by the guitar.

“It was late Spring of 1976 when I first saw a Gibson Style O Artist.  As a student at the University of California, Santa Barbara, the only entertainment I could afford involved visiting music stores and playing their vintage guitars.  Dropping into a tiny music store on the outskirts of Santa Barbara, all thoughts of Firebirds and Jaguars were driven from my mind when I was confronted by the largest and strangest acoustic guitar I had ever seen. Eighteen inches across and topped by a curlicue, the guitar stunned me with its outlandish appearance. 

Playing the O Artist was a revelation. Although I had to wrestle a neck that more than filled my hand, the thick, woody tone matched every ragtime lick I threw at it. As much as I loved my D-18 (purchased on a rent-to-own program), I could see that its sound was too modern for the music I wanted to play.

Although I considered the $750 price tag fair, it was far beyond my means. Barely able to make rent each month, the most I could do was visit the guitar every weekend until the day came when it was purchased and left my life forever.

Twenty-five years later my circumstances had improved and I was married to a woman sympathetic to my need to purchase derelict stringed instruments and have them repaired to playing condition. Our collection was small, but meaningful. The highlights have included: a 1948 Martin 0-18 found in Guatemala during our honeymoon (formerly owned by the leader of a Mayan marimba band), headstock chiseled to accommodate classical tuners; a 1930s-era Gibson HG-0 with a shattered top and a spray-painted finish; a 1936 Gibson L-10 archtop with a sunken top possibly caused by spending almost 70 years in a modified banjo tuning; a 1952 Kay K-161 (Jimmy Reed model) dropped during a gig; a 1923 Gibson H-1 mandola missing the headstock.

A number of these “treasures” had been found on eBay, so that’s where I turned after the cover of a Big Bill Broonzy CD reminded me of the lost Style O Artist. My search was immediately fruitful.  A 1920 O Artist had fallen victim to an amateur luthier: Almost all the finish had been removed, most of the binding had been replaced with vinyl weather stripping and the top had been routed to accommodate the extra width of the new “binding.” Missing were one set of tuners and the pickguard. The original tailpiece was present, but broken.  The top was cracked, a piece of the back had been replaced with plywood and a section of the side was severely cracked.  It was the perfect guitar for our collection.

Soon after the guitar arrived my wife and I took it the Fret House in Covina, California, for repair and restoration.  Our Martin O-18 had been repaired there and we loved the shop for its atmosphere, fine guitars and the expert advice available from the staff”. 

Okay, after hearing that I was hooked. In addition to the fact I liked the guy and felt sorry for him because this thing had been in pieces for over four years, I agreed to take it on because of the challenge it presented.  I might never get a chance to work on such an instrument again.  I agreed to honor the price the previous repairman had worked up, $1,100.00.  I thought it was a low but it was still a substantial amount of money.

My first step was to research the instrument to try and find out as much as I could.  Jim had talked to George Gruhn of Gruhn Guitars in Nashville who had once owned a Style O as a personal instrument  He would use the information in an attempt to push the old repairman in the right direction when he hit roadblocks.  As such, he knew quite a bit about the guitar.  The label was gone but the serial number was written in blue ink or pencil where it had been.  66950 could clearly be seen and from a web search of www.guitarhq.com it was determined that the guitar was made in the middle of 1921.  The order number on the inside of the head block was illegible.  I also got some valuable pictures from Frank Ford’s www.frets.com  and from the web site run by the National Music Museum located on the campus of The University of South Dakota, Included in this site were some great pictures of an O Artist from 1915, one of which was a close up of the label from that period. It was decided that I would make a reproduction of the label and document the fact in a smaller label underneath the soundboard, along with my name.

Jim wanted an instrument he could play and not just hang on the wall. At his request the top had been thinned with new braces so even if I had wanted to return the guitar to original 1921 specs it would have been impossible. It was more what could be described as a resurrection not a restoration.  Jim said he “wanted to be the coolest guy in the nursing home”, and that sounded like the right attitude to me.  I would not be using hide glue or varnish for a finish. The neck was over an inch and seven eighths wide and seven eighths thick with out the fretboard. It was to be taken down so it could be playable, so we used the measurements from a guitar in his possession.  He also wanted a truss rod installed and modern Waverlys, instead of the three in-line tuners that came on the guitar.  I had no problems with this because the guitar was in such bad shape, and it was to be a player.

The previous repairman had done a good job of splicing the side that was too damaged to repair.  Unfortunately he didn’t leave enough to use the pieces of the original wedge.  He had taken the guitar completely apart to affect the repair, but curiously he had re-glued the head block to the top and started to re-bind the body before the body was put together.  My guess is that he did this to try and compensate for the wide binding channel created by the vinyl “binding”.  I thought that this was a mistake and my first step would be to take the new ivoroid binding off and take the top back off what was left of the sides.  This was done using a silicone heating blanket to liberate the sides and acetone to remove the binding.

When this was done I created a mold of the guitar of the top using two thickness’ of particle board to rebuild the sides. 

I decided to make a new larger wedge so that I would not have to re-do his side graft.  I thought I would have enough to do as it was. One of the sides was badly crinkled at the waist.  So my first step would be to put the side back into shape with a bending iron.  Once that was done I cleaned up the end block and glued it to the grafted side.  There was only a small 14”section of the kerfing left and it appeared to be spruce.  I couldn’t find a supplier for it so I decided to make it myself.  I used my fret slotting jig to create the kerfing by putting a small piece of X-acto knife blade on the fence to use it as an indexer.  After the first slot is cut I move the freshly cut slot to the pin to cut the next slot.  This is repeated until I have enough to get the job done.  After installing the kerfing, I leveled the sides with a chisel and sanding block so that I would have a fresh surface to glue the top and back.

There were ghost images about 5/8” wide of what were side reinforcements.  Having not seen another Gibson from that period, I’m not positive but I assume they were hide glue soaked linen.  I thought because of the damage to the sides it needed something more, so I used 1/8” quartered spruce of the same footprint to bind them together.

Making a mahogany plug, I filled the end pin hole so that if there was any misalignment it wouldn’t be a problem.  The last thing was to make the wedge.  As I said the sides were a little short so I matched the color of the original wood used and made it a little bigger.

Now on to the top…  It was in as bad shape as the sides.  All the pieces were there, but there were several cracks and fissures.  They had already been glued together, but somewhat sloppily.  I did the best I could to clean them up, putting cleats on the inside to shore them up.  I cleaned the edges where the kerfing was and put on a label stating that I had restored the guitar, the date and that the manufacturer’s label was a reproduction.
Part 2 next week…